
This post is part of Donktober 2012. For more information please see here.
Welcome to the first post for Donktober - a month full of donkey-related craft and a chance for you to let your hair down and really party your ass off. Bad pun aside, I hope you will join me in the silliness and make some projects of your own. We'll be having a link-up next month and I can't wait to see your creations. More information on that to come.
So, let's kick off with a small tutorial for a button donkey. I mean, seriously, buttons + donkeys = bliss. Right? Right!

Before we start, though, I would like to point out that this gorgeous idea is not my own - I "borrowed" it (with permission!) from Dot's lovely blog, Busted Buttons. Thanks Dot!
YOU WILL NEED:
Assorted buttons
Pencil
Watercolour paint
Felt pens - for the mane, tail and grass
Googly (yes, it's a word) eye
Hot glue gunk
Canvas board or stiff card
Card for stencil
Frame
STEP 1 - PREPARE A FOUNDATION:
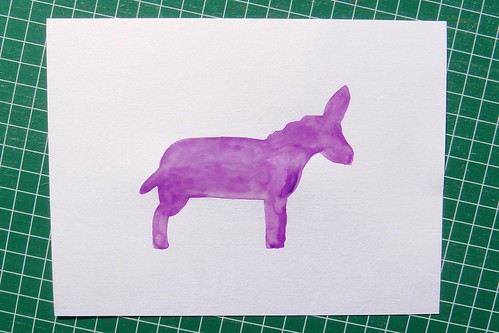
Make a stencil of your donkey and trace it onto your canvas (yes, you may use the same donkey as me). Fill in your design with paint - matching the colour of your buttons. This creates a solid foundation to glue your buttons to.
STEP 2 - GLUE ON THE FIRST LAYER OF BUTTONS:

Using your glue gun, start attaching your buttons to your donkey. Play with different sizes to help cover the space as much as possible. Don't stress though - we'll do another layer to help cover the gaps.
You should end up with something like this -
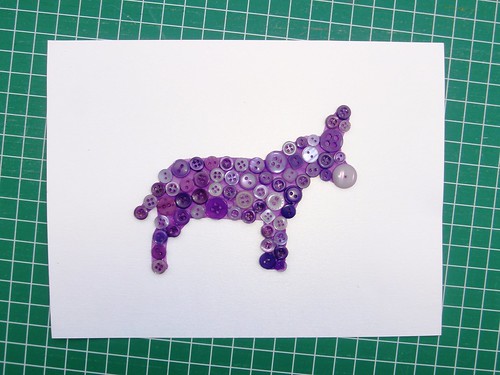
Leave it to dry.
STEP 3 - GLUE ON THE SECOND LAYER OF BUTTONS:
Repeat step 2, above, working to fill in the gaps by overlapping the buttons as you go.
STEP 4 - ADD THE FINISHING TOUCHES:

YOU WILL NEED:
Assorted buttons
Pencil
Watercolour paint
Felt pens - for the mane, tail and grass
Googly (yes, it's a word) eye
Hot glue gunk
Canvas board or stiff card
Card for stencil
Frame
STEP 1 - PREPARE A FOUNDATION:
Make a stencil of your donkey and trace it onto your canvas (yes, you may use the same donkey as me). Fill in your design with paint - matching the colour of your buttons. This creates a solid foundation to glue your buttons to.
STEP 2 - GLUE ON THE FIRST LAYER OF BUTTONS:
Using your glue gun, start attaching your buttons to your donkey. Play with different sizes to help cover the space as much as possible. Don't stress though - we'll do another layer to help cover the gaps.
You should end up with something like this -
Leave it to dry.
STEP 3 - GLUE ON THE SECOND LAYER OF BUTTONS:
Repeat step 2, above, working to fill in the gaps by overlapping the buttons as you go.
STEP 4 - ADD THE FINISHING TOUCHES:
Finish off your donkey by attaching an eye; and drawing on a mane, fluffy tail and some grass for him to munch on. Viola!
Thanks again to Dot of Busted Buttons for letting me re-work her original button elephant, especially for Donktober. Be sure to stop by to check out her gorgeous creations. And don't forget to say 'hello'.
On the Donktober schedule for this Wesnesday is Becca over at making rebecca lynne. Be sure to check out her adorable donkey softie, the pattern review and... maybe she'll even spoil you with a giveaway. Fun!
E.